How to Create and Customize Your Own Minecraft Skin

Minecraft is more than just a game; it’s a world of creativity and imagination where players can shape their own experiences. One of the easiest ways to express your personality in Minecraft is by customizing your in-game character using a unique skin. This article will guide you step-by-step on how to create and customize your own Minecraft skin, from understanding the basics to uploading and sharing your design.
Understanding Minecraft Skins
Before diving into the world of skin creation, it's important to understand what Minecraft skins actually are and how they fit into the game.
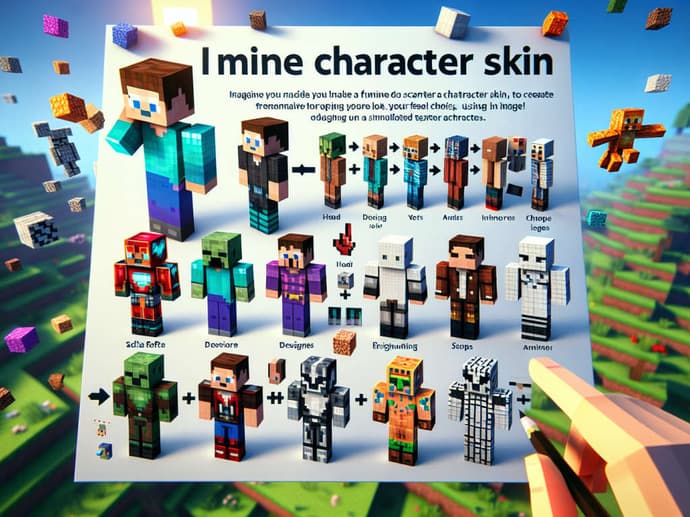
Minecraft skins are the textures that wrap around the player's character model. They are essentially 2D images that are mapped to the 3D model of a Minecraft player, and they can dramatically change how your character looks in the game. Whether you want to be a hero, an animal, or even a character from your favorite movie, the possibilities are endless with custom skins.
A standard Minecraft skin consists of a 64x64 pixel image (for Java Edition), with each part of the body—head, torso, arms, and legs—mapped out clearly. Skins also have layers for more advanced designs, such as adding clothing or accessories on top of the base character. In recent versions of Minecraft, the skin format has been extended to accommodate additional customization features, making it easier than ever to create truly unique designs.
Preparing to Create Your Skin
Creating a custom Minecraft skin requires selecting the right tools based on your experience level. For beginners, online Minecraft skin editors like Skindex and NovaSkin offer easy-to-use, browser-based interfaces, allowing you to customize skins by adjusting colors and features with a simple click and drag. If you're more experienced with graphic design, software like Photoshop, GIMP, or Aseprite gives you greater control over advanced features such as shading and custom textures.
Regardless of the method you choose, Minecraft skins must be saved in PNG format to work properly in the game.
Step-by-Step Guide to Creating a Minecraft Skin
Creating a Minecraft skin is like designing pixel art. Start with a blank template or an existing base skin from websites like Skindex. Once you have a concept for your character (e.g., superhero, pirate, or robot), choose a color scheme and layout.
Editing the Skin
- Head: Add facial features, hair, or accessories like hats and masks.
- Torso: Customize with clothing, armor, or accessories, ensuring symmetry.
- Arms and Legs: Add details like gloves, boots, or pants.
Keep the design simple, as Minecraft skins are flat 2D images.
Using Texture Layers
Texture layers let you add extra details, such as clothing, weapons, or facial expressions. The outer layer can be used for items like shirts or backpacks, while the inner layer allows for finer details like hair or facial features.
Customizing Your Skin Further
Minecraft is all about creativity, and your skin should reflect your personal style. If you're looking to take your design to the next level, there are many ways to further customize your Minecraft skin.
Themed Skins
Themed skins are a popular choice among Minecraft players. You can create skins based on your favorite TV characters, animals, or even in-game Minecraft mobs. For instance, you could design your character as a wizard, complete with a robe and magic staff, or transform into a pixelated dragon.
Special Effects and Patterns
Adding custom patterns or effects to your skin is another way to make it stand out. This could include things like stripes, spots, or even glowing effects (for certain versions of the game). These effects can be created using shading techniques or by adding additional layers of texture.
Skin Editors with Animation
Some advanced skin editors allow you to animate certain parts of the skin. While Minecraft doesn’t natively support skin animations, you can create "moving" parts, like flowing hair or a waving flag, that can make your character seem more dynamic when viewed from different angles.
Uploading and Testing Your Minecraft Skin
Once you've created your perfect skin, it’s time to upload it into Minecraft and see it in action.
How to Upload Your Skin
Uploading your custom skin is easy:
- Open Minecraft and go to your profile settings.
- Click on the "Browse" button under the "Skin" section.
- Choose the PNG file you’ve created and upload it.
Once uploaded, your new skin will be applied to your Minecraft character the next time you log into the game.
Testing the Skin
After uploading your skin, it's essential to test it to make sure everything looks right in-game. Make sure your skin displays correctly in both the first-person and third-person view. You can use Minecraft's previewer tool or simply log into the game and observe how your character looks while moving and interacting.
Sharing and Downloading Minecraft Skins
Once you’ve created a skin you’re proud of, you might want to share it with the Minecraft community or download skins created by others.
Websites like Skindex and Planet Minecraft allow users to upload and share their skins with the broader Minecraft community. This is a great way to showcase your work and let others enjoy your creations. You can also share your skin on social media or Minecraft forums.
If you’re looking for inspiration or want to try out different skins, there are plenty of websites where you can download skins created by other players. Always make sure to respect the creators’ work by providing credit if you decide to use someone else’s skin.
Conclusion
Creating your own custom Minecraft skin is an exciting and creative way to enhance your gaming experience. Whether you're designing a skin for a favorite character, a unique persona, or just for fun, Minecraft skins allow for endless customization. By following the steps in this guide and utilizing the tools available, you can create a skin that’s truly one-of-a-kind.

Елен Стельмах - творческая личность, которая занимается развитием игровой культуры с помощью статей и визуального дизайна. Являясь постоянным автором EGamersWorld и дизайнером игрового сайта, Елен не только создает контент, но и наполняет его энергией и креативностью.
 Roblox Anime Guardians Коды февраль 2026Узнайте все рабочие коды Roblox Anime Guardians. Обменивайте их на бесплатные мистические монеты, перероллы трейтов, артефакты и награды.
 Онлайн-казино за пределами Великобритании: Игры, форматы и что ожидает игроковОнлайн-казино, работающие вне игорных рамок Великобритании, привлекают внимание благодаря различиям в моделях лицензирования, портфелях игр и рекламных...
 Биткоин-казино и криптовалютные игорные платформы для игроков из ВеликобританииПлатформы для азартных игр на основе криптовалют стали заметным сегментом мирового рынка онлайн-казино.
 Лучшие международные онлайн-казино для игроков из ВеликобританииИндустрия онлайн-казино - это постоянно развивающийся сектор, признанный благодаря своим технологиям, обширной библиотеке игр и объему прибыли, которую он приносит...


